


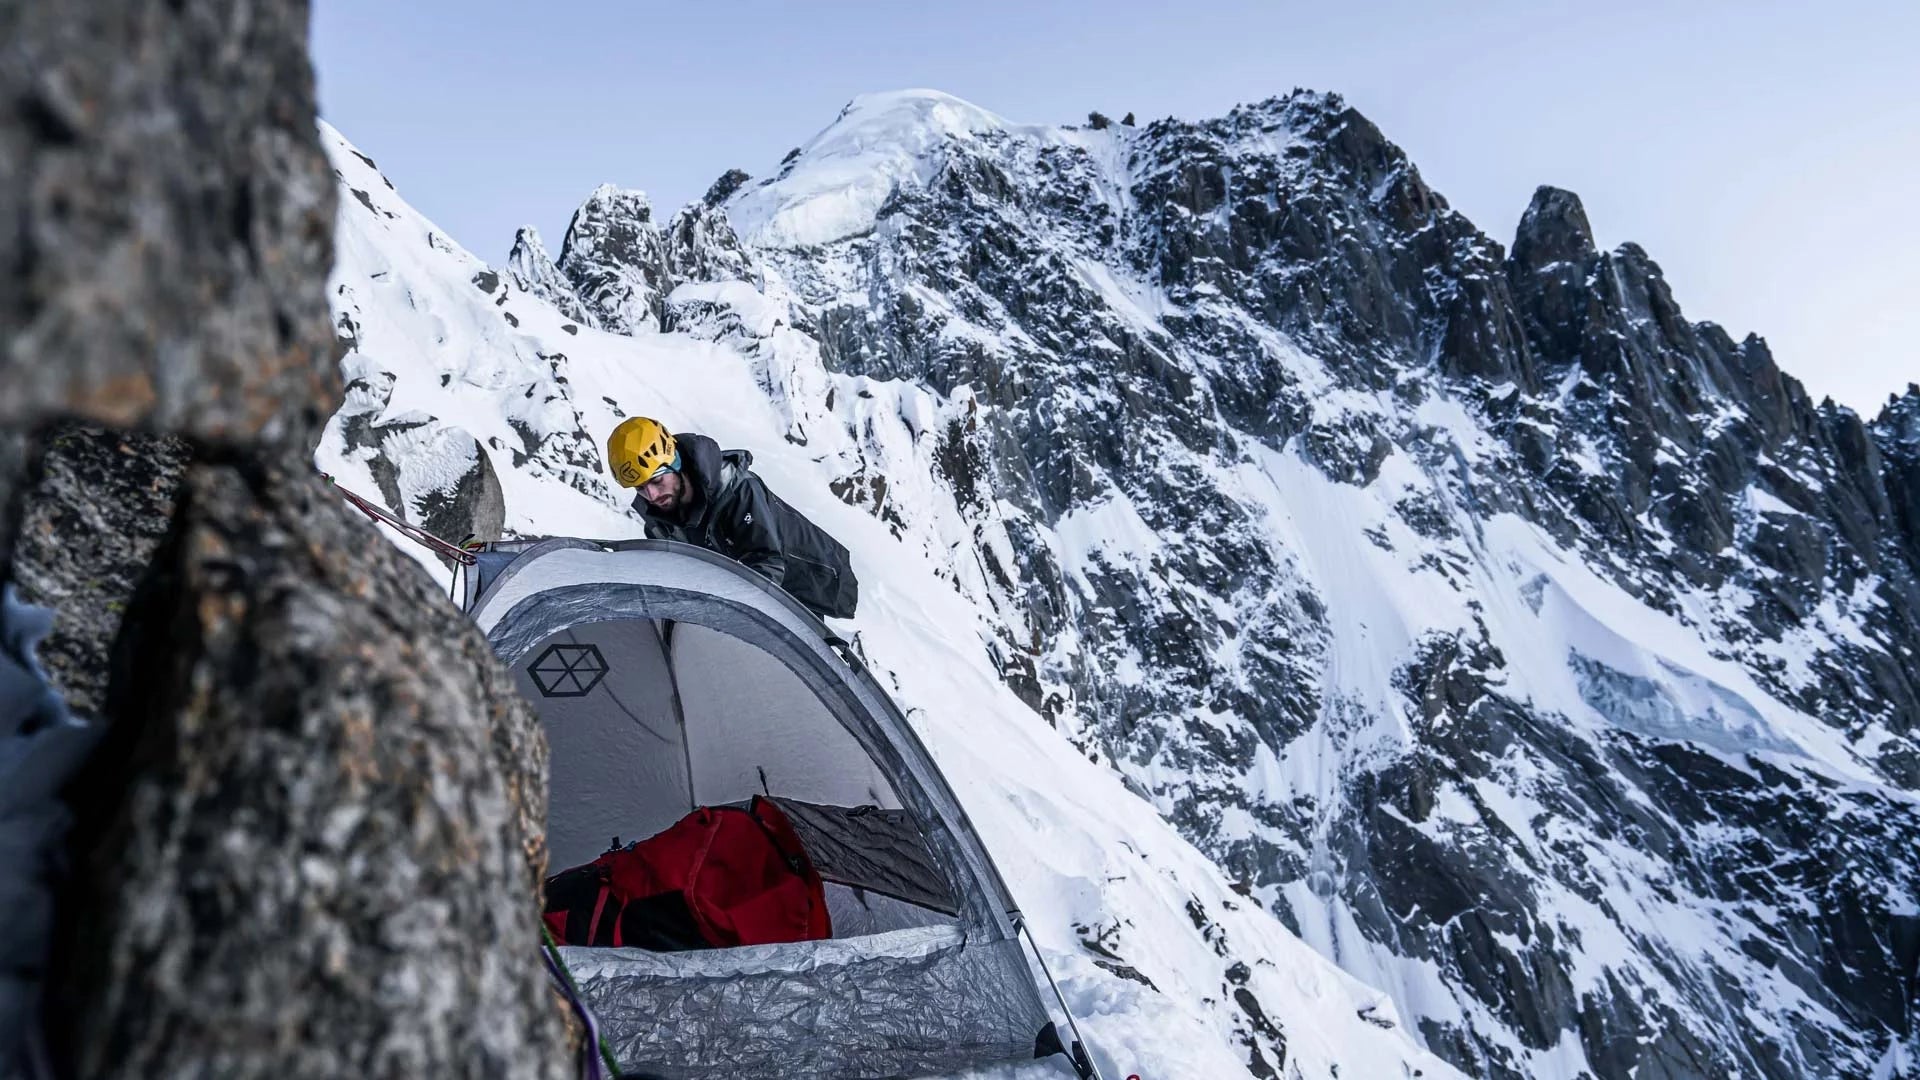


Gaining access to routes guarded by snow and ice often leads climbers to learn the nuances of glacial travel. The importance of knowing self-rescue becomes evident when standing in front of a gaping crevasse or while walking a sagging snow bridge that no one wants to cross!
The lure of an amazing alpine route sometimes pulls climbers across glaciers before they are ready or without the necessary knowledge, tools and skills to safeguard them in case of an accident. Alternatively, you may find a glacier guarding a descent route or end up on one after an unexpected emergency rappel due to weather conditions. This article is going to look at different tools that experts use to self-rescue, but always remember these are rescue tools, avoiding a rescue is always preferable.
Disclaimer: Crossing Glaciers, as well as all forms of climbing, are inherently dangerous. The descriptions of techniques and procedures in this article are intended to provide general information. This is not a substitute for formal instruction, routine practice, and plenty of experience. When you follow any of the procedures described here, you assume responsibility for your own safety. The information below is a "personal opinion piece" and has been provided in good faith. It cannot be seen as "complete" as it does not cover every eventuality. We are simply offering readers useful information for a complex sport which is by its nature, dangerous. Hope you enjoy reading through this article!
Scenarios
We are going to start by presuming the climbing teams crossing glaciers have the knowledge, tools and experience to attempt a self-rescue. Without the tools or knowledge, the only remaining solution is waiting for external help.
- Unroped and unexpected. A team of climbers is crossing a glacier when one member disappears into a crevasse. The team was not roped up and crevasses had not been expected. This is probably the worst-case scenario as the initial fall, without a rope to catch them, could be fatal and is very likely to lead to an injury, making rescue more complicated. This also covers the scenario where you come across another party who has had an accident and you are called to assist.
- Roped up but unexpected. A team of climbers is crossing a glacier when one member unexpectedly falls in and the remaining team members arrest the fall. The act of arresting a falling climber and not being dragged in takes skill and can be assisted by knots in the rope and by having larger teams.
- Roped up and expected. With enough foresight, experience and judgment you can often see the telltale signs of a crevasse so you can avoid them. Alternatively, if you have to cross a snow bridge, having the team ready, braced and with minimal slack will reduce the fall length and make self-rescue significantly easier.

Rescue Solutions
Unroped and unexpected
This scenario is one of the more complicated and requires a higher level of skill, understanding of the tools required and is both physically and technically hard. The basic steps are:
- Build an anchor and secure a working area.
- Approach the crevasse lip, assess the situation and communicate with the victim if possible.
- Prepare the lip to allow the rope to run over it
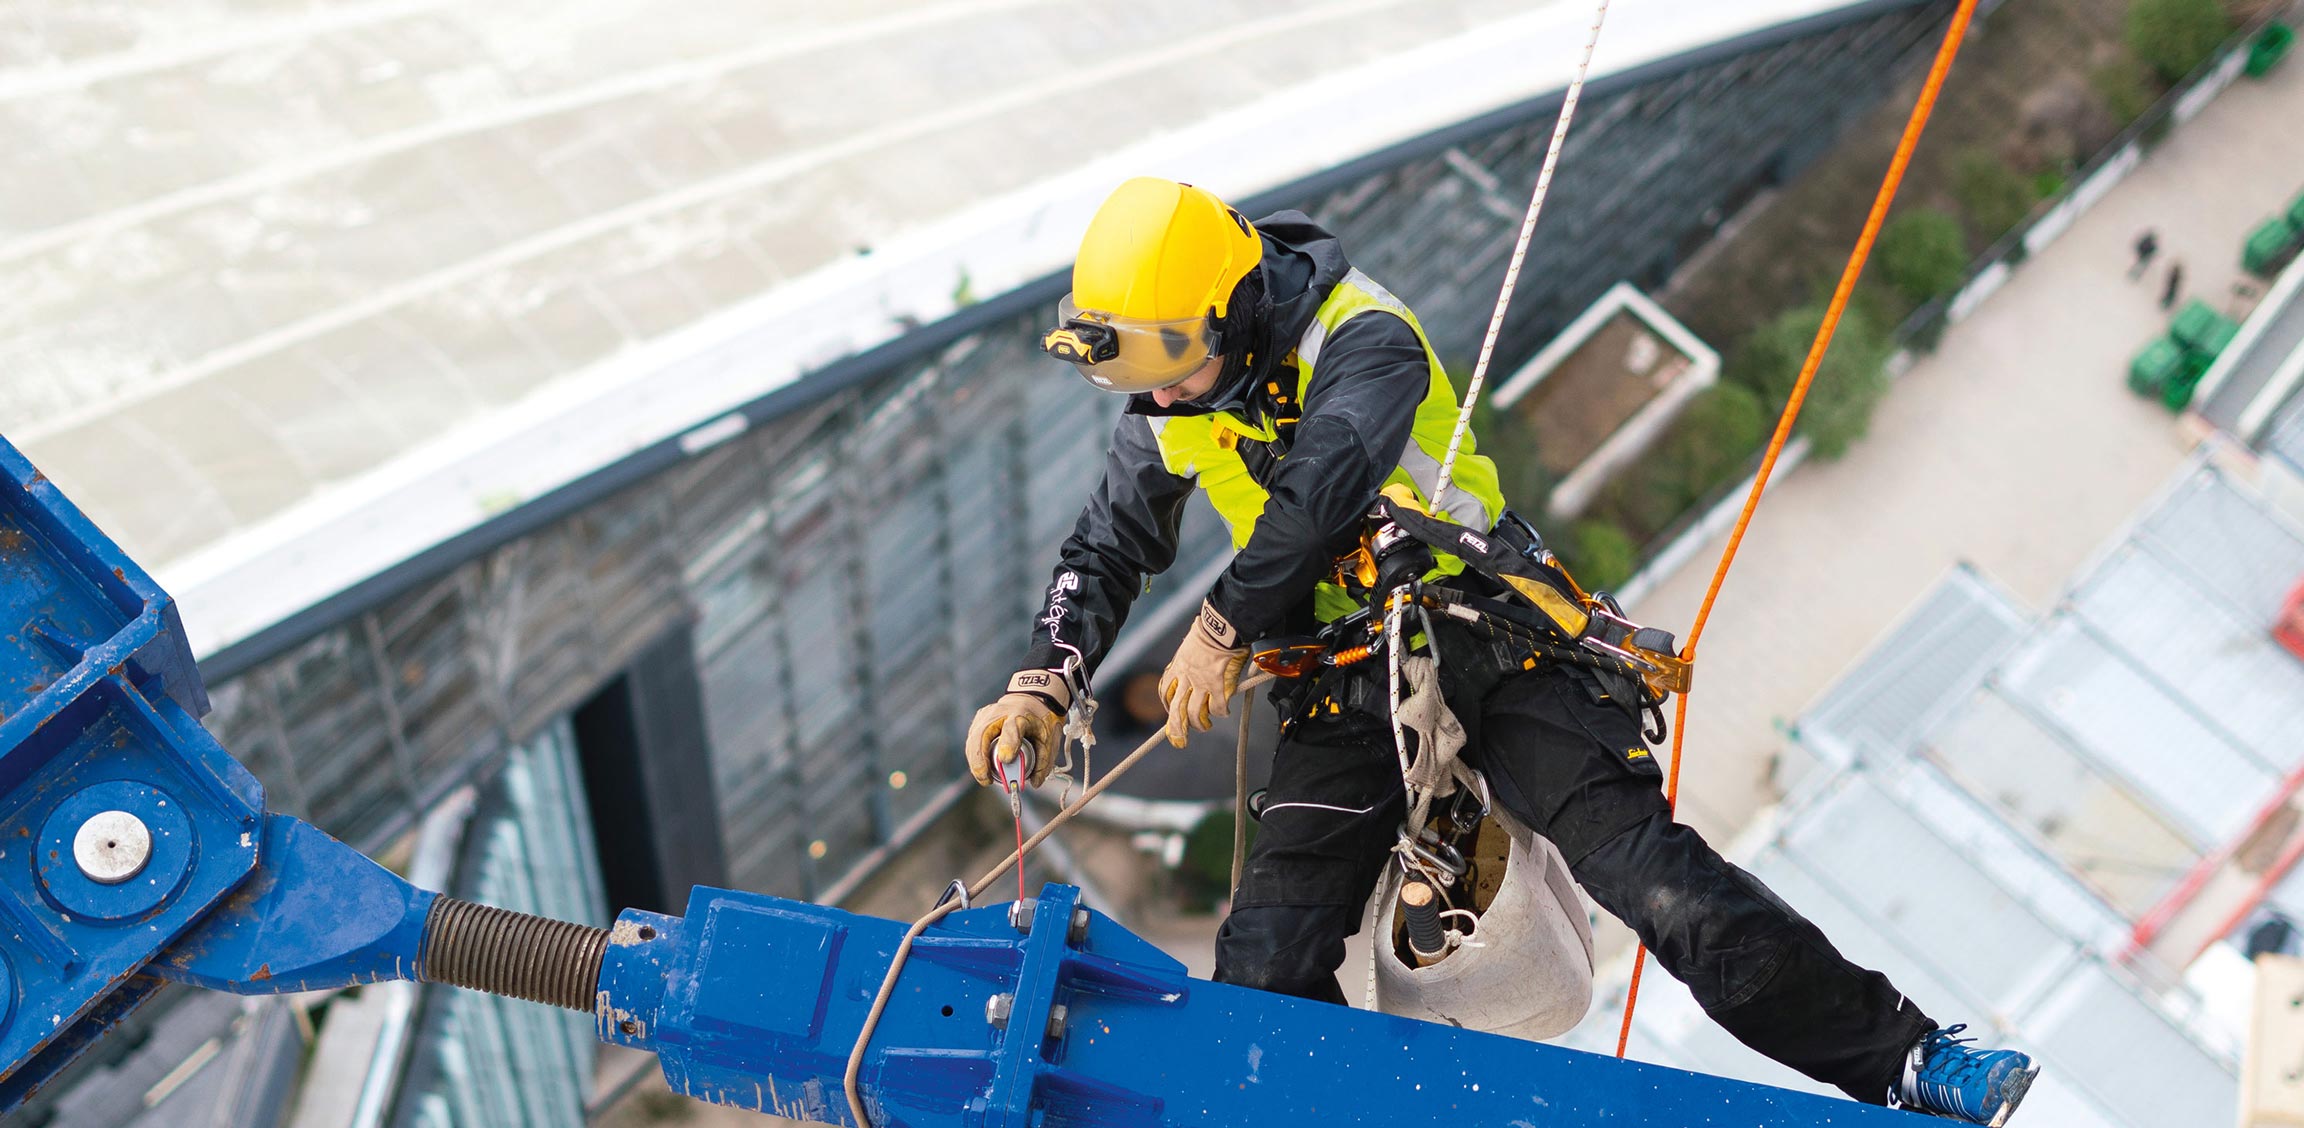
- Rappel into the crevasse, administer first aid, fit a harness onto the victim and attach the rope to them. (Possibly a drop loop)
- Ascend the line
- Haul the victim out. This is both physically and technically hard.

Roped up but unexpected
In this scenario, the climbers were roped and had the skill to arrest the victim's fall. Depending on the condition of the victim, the distance of the fall, and the complexity of the extraction, various solutions can be used for crevasse rescue. This is less complicated than scenario one as the victim is in the rope system already. The rescuers can send down a rope to a conscious uninjured victim and they can either ascend the rope or be hauled out. A rope team can sometimes initiate a haul (or the victim can ascend) on the original line depending on how deep the rope is buried into the lip, alternatively, you will need to send down another line and then prepare the lip to allow the victim to escape. The basic steps are:
- Arrest the fall
- Build an anchor and transfer the load.
- Secure a working area.
- Approach the crevasse lip, assess the situation and communicate with the victim if possible.
- Prepare the lip to allow the rope to run over it
- Lower a drop loop or a line depending on how much rope you have
- Haul the victim out

Prepare the lip to allow the rope to run over it
Roped up and expected
This is the easiest and quickest rescue. This simple scenario can be solved by the fallen climber ascending the rope and crawling out of the crevasse. Because the team was ready for the fall, the fall distance would have been reduced and the chances of being pulled into the crevasse greatly reduced. Sounds simple enough but without a few basic tools, ascending a skinny free-hanging rope is very hard. The basic steps are:
- Brace - Arrest the fall
- Build an anchor and transfer the load.
- Secure a working area.
- Approach the crevasse lip, assess the situation and communicate with the victim if possible.
- Prepare the lip to allow a rope to run over it
- Either lower a rope to the victim so they can ascend it or if the original line isn't cut into the lip too badly they can ascend the original line.
- The victim ascends the rope.

Basic Principles
Learning to perform the basic rescue elements individually from a professional in a safe teaching environment will help when you are stressed and scared during a real accident. Practice with your team before you go.
- Know how to rope up correctly for the size of your team and rope length.
- Know how to approach glaciated terrain.
- Know self-arrest techniques.
- Know how to build a snow anchor.
- Know how to transfer a load between systems.
- Know how to locate and approach a crevasse safely
- Know how to prepare the lip for extraction.
- Know how to safely rappel.
- Know how to ascend a rope.
- Know how to set up a hauling system and increase mechanical advantage.
- Know your basic rope skills, knots and how to use the tools.
Extra skills
- First Aid
- Understand how to communicate to request external help.

Fit a harness onto the victim and attach the rope to them
The Tools
Anchors
The foundation of all glacier rescue is the construction of an anchor which can often be difficult when the weight of the fallen climber is pulling you and the team toward the danger. There are many possible snow and ice anchors so we are going to outline the most common ones you might expect as a climber and the tools needed.
- Ice Screw anchor: If you can access quality blue ice, often found on a summer glacier, place two ice screws and equalize the anchor in the direction of the pull. Preferably using long anchor screws 17cm in length or longer
- Picket anchor: If no ice is available then driving a picket deep into condensed snow is another way of creating a reliable anchor. Alternatively, but not optimal you could use a snow fluke.
- Ice Axe anchor: A common solution for snow anchors is to create a deep slot perpendicular to the direction of pull and place your ice axe inside with a sling wrapped around with a carabiner that becomes the master point of your anchor. Ensure this is well-buried with consolidated snow
- Pack anchor: Beyond having the anchor tools listed above you can simply dig a snow hole, preferably using a shovel, and bury a filled pack with a sling wrapped around it.
- Other options include burying skis but you are a climber so that's unlikely, or you can master the art of building snow bollards.
Whatever method you select, one basic principle applies here, IT CAN NOT FAIL as that would be catastrophic. When in doubt, back it up.

Ropes
As an alpine climber, it is normal to use part of your rock climbing system as your glacier travel kit however there are a few key factors that make ropes more suitable for glacier rescue.
- Dry - Ensure your rope is dry treated, a wet frozen rope can become heavy and unmanageable
- At least 30m - You will need enough rope to perform a rescue, once a rope is buried into the lip of a crevasse and connected to an anchor you might not have enough to send the victim a line! Climbing teams often have 60m at least, and it is common to bring multiple 30m ropes when travelling with a party of 3 or greater.
- Semi-Static, Static, and Ultralight hyperstatic ropes vs Dynamic - There is an ongoing debate around which is best as each rope type is better suited for different functions. Dynamic ropes are easier to catch a fall, static ropes are easier to haul. Often if the rope isn't being used for lead climbing a team will choose a semi-static as it offers a suitable compromise.
- Single rope, Half-rope, or Twin rope - All of these ropes will be strong enough for the forces generated during a crevasse fall and rescue. Choose a rope system based on the overall climbing objective.

Harness
The foundation that connects you to the rope, and modern harnesses are extremely light and packable. Harnesses that are designed purely for glacier travel can weigh as little as 49g but are not suitable for rock climbing objectives. Pick your harness based on the objective, for example, if you are climbing a pure rock route with simple glacier crossing we would suggest a more durable and comfortable harness. Here are a few examples of terrain and suitable harnesses.
- Pure glacier travel harnesses - Petzl Fly, Blue Ice Chucas
- Alpine climbing with glacier travel - Blue Ice Choucas Pro, Petzl Altitude
- Mixed Ice and Rock - BD Solution Guide, Petzl Whisper
Helmet
If you fall into a crevasse a helmet may be vital in stopping you from being knocked unconscious or injured, modern helmets are extremely light and rescue becomes exponentially harder with an unconscious victim involved.
- Extremely light, when saving every gram counts - Blue Ice Blast
- General climbing and mountaineering - Black Diamond Vision
- A more durable helmet that works in the alpine too - Camp Ikon
Ice Axe
An ice axe is useful for climbing, self-arresting and anchoring while moving through glaciated terrain. Modern ice axes have diversified and become specialized depending on your terrain choice. Axes can be super lightweight and designed for short periods of traveling over snow or extremely aggressive for pure ice climbing. We would recommend different ice axes depending on the seriousness of the snow and ice terrain you are negotiating.
- Simple small snow crossings and lower angle terrain - Blue Ice Hummingbird
- Classic Mountaineering, snow-covered summits and glaciated terrain - Grivel Air Tech Evolution
- Steeper terrain, gullies with short technical sections - Petzl Gulley
- Continuous Steep Ice/Snow and mixed - 2 x Petzl Quark Axe
Crampons
Crampons are essential to provide traction on the icy surface of a glacier and snow slopes. They can be super lightweight and attach to a running shoe or at the other end of the scale can be extremely durable and only attach to a front and back bail (welt) of a mountain boot; make sure you match your crampons to your footwear and to your objective.
- Snow Walking Crampons that would fit on an approach shoe - Petzl Leopard Crampons
- General Mountaineering Crampons for more significant time on snow and ice - Blue Ice Griffin 10, Petzl Irvis Hybrid
- Technical Mountaineering Crampons for steeper routes - Petzl Sarken Crampons, Blue Ice Harfang
- Waterfall Ice and Mixed Crampons - Grivel G20 Crampons, Petzl Dart
Pulleys
Pulleys are commonly used to reduce friction in a rescue system, alternatively, they are part of creating a progress capture system with mechanical advantage to help haul a victim out of a crevasse. We recommend the Amarok Piccolo Prodigy PMP Pulley as it is efficient and lightweight, the Edelrid Axiom Slider Carabiner with integrated pulleys, or if weight minimization is your goal you could take a Petzl Oscillante pulley.
Slings
Slings are useful for building anchors, creating foot loops, and extending rappels and with some knowledge can be used as chest harnesses or to set up tandem rappels.
We recommend lightweight hydrophobic slings such as the Black Diamond 10mm Dynex Runners or the Mammut Contact sling. A longer 180cm or 240cm length is useful for anchor building in snow.
Progress Capture Devices and Rope Grabs
Progress capture devices allow the rope to glide easily in one direction but hold firmly in the other, this is especially useful when hauling or ascending a rope. We recommend a Petzl Nano Traxion or Ederid Spoc. We also recommend taking a rope grab such as a Tibloc.
Carabiners
Carabiners are used at the anchor, on your belay device as well as in numerous other applications, they are a foundational piece of gear for any glacier kit. At least one carabiner in your kit should be large enough (HMS Shape - See Carabiner Guide) to run a munter hitch comfortably through it. We would recommend the Camp Nitro Lock Screwgate Carabiner or Petzl Rocha. Other lightweight options include the Grivel Plume K3GH HMS Twin Gate or the DMM Phantom Screwgate.
Belay Device
Belay devices can be used to rappel into a crevasse, used during a haul system or can be used to belay someone over a snow bridge or up a pitch of climbing. Modern alpine rope diameters have reduced and therefore belay devices now have been adapted for these skinny ropes. You should match your belay device to the rope diameter you are taking. For bellaying or rappelling on thin alpine ropes such as the Petzl RAD Line check out the Grivel Scream Belay Device or Edelrid Mago Figure 8. If you are using a larger rope diameter you can use your normal auto-blocking device such as a Petzl Reverso.
Prusik Cords
Prusik loops are used to grab a rope during a rappel, provide a method of ascending a rope, and can also be used as part of a progress capture system. This versatile tool, when used with the right knowledge, can grip ropes in various scenarios, transfer loads, and create ascending and hauling systems.
We recommend accessory cord in the 6mm diameter, 1.5m length for your personal prusik, along with a 5m length for advanced hauling systems and anchor building.
If you are using a Petzl Rad Line or Mammut Glacier Cord, you can also use 5mm accessorry cord for as your personal prusik.
Another great alternative for ropes of all diameters is the Sterling Hollow Block, which is made from highly durable Technora®.
Avalanche Probe
Probes are very useful to locate the edge of a crevasse and they allow you to keep your distance while probing the snow and ice in front of you to establish where the snow bridge begins. This tool, while essential for ski touring, is usually the first piece of kit left behind when climbers are looking to reduce weight.
Specialty Kits - The Petzl RAD System Kit
- 30 m RAD LINE, A 6 mm rope developed specifically for crevasse rescue, rappelling, and roping up on a glaciers.
- 3 Sm’D SCREW-LOCK carabiners
- 1 TIBLOC ascender
- 1 NANO TRAXION progress-capture pulley
- 1 ST’ANNEAU 120 cm sling
- Equipment is contained in a storage bag
What Do Guides Carry?
Local mountain guide, Monte Johnston with Black Sheep Adventure Guides, and friend to Climb On Equipment has listed his preferred glacier travel kit as;
- Petzl Altitude Harness
- 2 x Camp Nano 22 Carabiners
- 1 x Grivel Clepsydra S Carabiner
- 2 x Camp Nitro HMS Carabiners
- 1 x Edelrid Pure Screw III Carabiner
- 16cm BD Ultralight Ice Screw
- Edelrid SPOC
- Petzl Tibloc
- 1 x 120cm Dyneema Sling
- 30m Mammut 6.0mm Glacier Cord
What Do Pro Athletes Carry?
Eric Carter, a local ski mountaineer and Ar'cteryx athlete has spent more than a few hours traversing glaciated terrain and has narrowed his kit down to the absolute essentials. This is what he takes on different objectives.
Conclusion
Glacier travel in the mountains can lead to highly rewarding routes and summits, while escaping the crowds and heat in the valleys below. But this style of climbing comes with its own set of objective risks and dangers which require instruction, apprenticeship and practice to learn how to route find and problem solve in the case of an accident. We suggest training with accredited mountain guides to learn the basics, and then regular practice of those skills to stay sharp so you can put those skills to immediate use in the field. Have more questions about the gear, tools and recommended kit for glacier travel? Climb On Equipment is always here to serve you, whether you’re signed up for your first glacier travel skills course, or you need that special piece of gear for a remote trip into the mountains.
Leave a comment